If you haven’t heard of Continuous Integration yet, it’s the practice of setting up an automated system that rebuilds projects automatically whenever someone commits a new change to your source code repository. It ensures that whatever is in your repository builds and runs: automated builds usually involve compiling, running unit tests and packaging the installer.

To do continuous integration, you need a tool that monitors your source code repository and starts the builds – a continuous integration server. My weapon of choice is TeamCity, a free CI server written in Java with first-class support for .NET and its toolchain (like NAnt, NUnit, NCover or PartCover).
TeamCity is pretty easy to deploy – the Windows package has an installer which leaves you with a fully working server after just a few clicks and even the Linux package is pretty simple to deploy: Download, unzip, run runAll.sh and you’re done. To properly integrate it into a Linux server (so it will come back up after rebooting and can be reached via HTTP without having to run either Apache or TeamCity on a non-standard port), you’ll need to run your own Tomcat server.
This guide will tell you how to do it!
1. Install Tomcat
Apache Tomcat is a Java-based web server for Java Servlets and Java Server Pages. If you download one of the packaged TeamCity distributions, they already include a pre-configured Tomcat server that runs on port 8111 and serves the TeamCity web application.
To properly install TeamCity for production use, you’ll want to run our own system-wide Tomcat server, of course. Luckily, setting up Tomcat on a Gentoo Linux system is very easy. Just run:
emerge tomcat
and sit back ;-)
After Tomcat has installed, start it using its init script:
/etc/init.d/tomcat-6 start
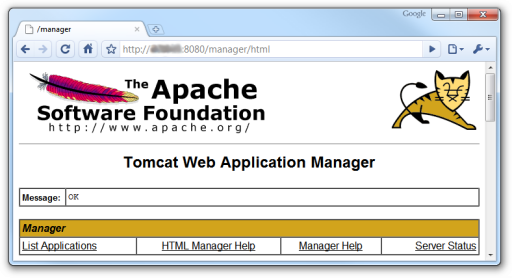
By default, Tomcat is configured to run on port 8080. Verify that you can now access the Tomcat manager applet by navigating to http://localhost:8080/manager/html/.

2. Install TeamCity
Download the WAR distribution of TeamCity from JetBrains’ website and place it into Tomcat’s webapps directory.
On Gentoo Linux systems, this directory is /usr/share/tomcat-6/webapps, so the file’s path would end up being /usr/share/tomcat-6/webapps/teamcity-x.y.war. WAR files are simply zip archives following a certain structure, so for a minor performance gain, you could also unzip the WAR archive into a new directory at /usr/share/tomcat-6/webapps/teamcity/.
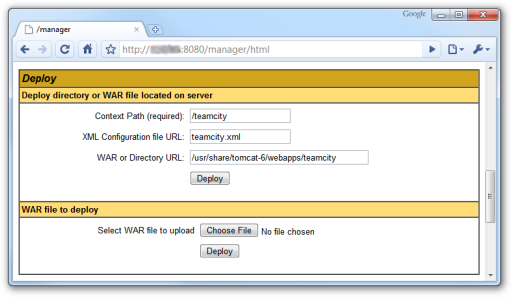
To start the web application, open the Tomcat manager applet once again (http://localhost:8080/manager/html/) and scroll down to the deploy section. Enter the following strings into the three text boxes:

-
Context Path (required): /teamcity
Virtual directory in your Tomcat server in which TeamCity will be reachable. If you entered ‘bla’, TeamCity’s URL for Tomcat would be http://localhost:8080/bla. -
XML Configuration file URL: teamcity.xml
Name of the configuration file for the TeamCity web application as it will appear in your /etc/tomcat-6/Catalina/localhost/ directory). -
WAR or Directory URL: /usr/share/tomcat-6/webapps/teamcity
Full path to TeamCity’s WAR file or the directory you extracted the WAR file contents into.
Then click on “Deploy”
As of now, when you browse to http://localhost:8080/teamcity, something from TeamCity should appear (probably an “Ooops, something went wrong…” page with an error message stating that the database could not be locked – we’ll resolve this in a minute!)
3. Give Tomcat a Home Directory
The problem at the end of step 2 is because TeamCity tries to set up its local directory structure in /dev/null (which, as most Linux users probably know, won’t work too well :P). I suppose the right approach would be to change the settings for TeamCity in a web application specific configuration file somewhere, but I haven’t found the place to do this, so my solution:
Assign a home directory to Tomcat.
mkdir /home/tomcat
chown tomcat:tomcat /home/tomcat
usermod --home /home/tomcat tomcat
Now TeamCity should start and set up camp in /home/tomcat/.BuildServer
4. Install Fonts
If you’re running TeamCity on a headless system, you probably don’t have any system fonts installed. TeamCity requires a set of standard fonts to render the bitmaps on a project’s statistics page, so if you’re getting an error message like Unexpected Error: Cannot read property: graphInfo on that page, this is very likely the reason.
You can either install corefonts, a set of Microsoft TTF fonts that will make TeamCity look almost as it would when run on a Windows server:
emerge corefonts
…or choose the Arkpandora set which consists of free fonts with compatible proportions to the Microsoft fonts, all based on the BitStream Vera font:
emerge arkpandora
5. Switch to MySQL
By default, TeamCity uses the HyperSQL Database, a database completely written in Java that works out-of-the-box with no setup in TeamCity. However, JetBrains does not recommend this database for production use – probably less so because of possible reliability/upgrade reasons than to nudge you into consolidating your data in a centrally maintained and backed up database.
For most Linux systems this centrally maintained and backed up database probably is MySQL. To use MySQL as the database backend for TeamCity, follow the official setup guide, which is:
-
Run TeamCity once, then shut it down (this ensures TeamCity’s home directory is created and filled)
-
First, delete TeamCity’s two data directories at /home/tomcat/.BuildServer/system/artifacts and /home/tomcat/.BuildServer/system/messages, then remove the old HyperSQL database files stored as /home/tomcat/.BuildServer/system/buildserver.*.
-
Create a new MySQL database and a MySQL user to access that database. A popular way to do this is via phpMyAdmin.
-
In your /home/tomcat/.BuildServer/config directory, copy database.mysql.properties.dist to database.properties and edit it to reflect your MySQL hostname, database, user and password.
-
Download MySQL Connector/J and place the jar file contained in the package (mysql-connector-java-5.1.12-bin.jar) in your /home/tomcat/.BuildServer/lib/jdbc directory (this requires TeamCity 5.1 or later)
When you now start TeamCity again, it should populate your MySQL database and display the license screen again.
6. Set Up mod_proxy_ajp
As a final step (and if you’re using Apache 2.2 or later), you can integrate TeamCity into Apache so that it can be accessed alongside other web applications written in PHP or .NET.
To do this, you need
To enable mod_proxy_ajp, add the proxy and
proxy_ajp modules to your APACHE2_MODULES
list in /etc/make.conf if you haven’t already:
# ...original APACHE2_MODULES definition...

# Enable mod_proxy and mod_proxy_ajp for Tomcat proxying
APACHE2_MODULES="${APACHE2_MODULES} proxy proxy_ajp"

# ...other stuff....
Afterwards, rebuild your Apache (or install it if you haven’t already):
emerge --deep --update --newuse world
To integrate TeamCity into the content served by Apache at any level, simply add this to the <VirtualHost /> of your choice in /etc/apache2/vhosts.d/yourvhost.conf (if you haven’t set up any vhosts yourself, use the default vhost at /etc/apache2/vhosts.d/default_vhost.include)
# TeamCity
#
ProxyPass /teamcity ajp://localhost:8009/teamcity

<Location /teamcity>

  #
  # Controls who can get access this location.
  #
  Order allow,deny
  Allow from all

</Location>
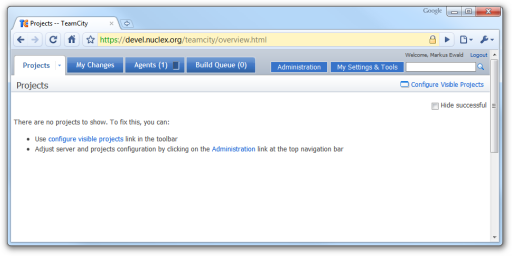
That’s it. You can even serve TomCat web applications via HTTPS if you wish now. Check out my own TeamCity setup running on this very server: https://devel.nuclex.org/teamcity ;-)
