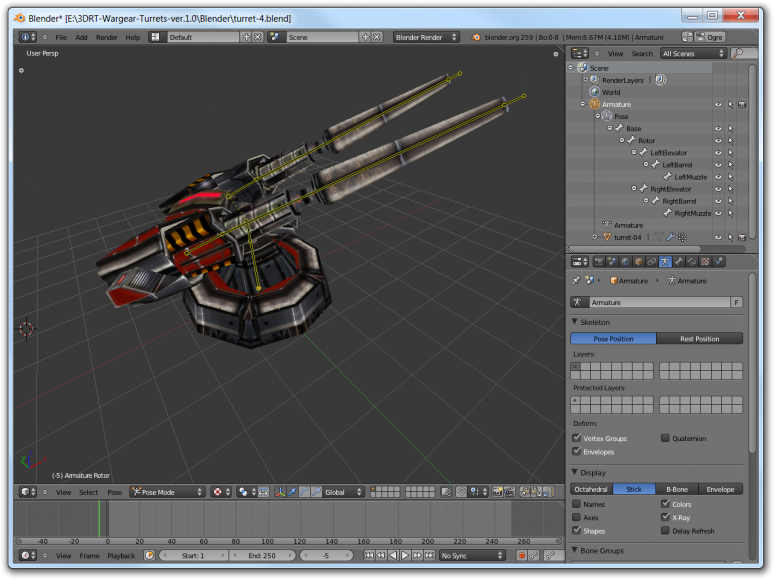
A few months ago, I published a tutorial explaining how you can rig a model in 3ds Max. It explained the whole process of merging a model (to reduce the number of draw calls), creating bones and making parts of the mesh follow those bones.
Well, I was doing all that using a trial of 3ds Max which, eventually, ran out. I’m not quite sure how it came to be, but I ended up giving Blender another try. I had already attempted to learn Blender shortly after it was Open Sourced and it left me with the impression of being a possibly capable modeler with an interface so obscure that it’s not worth the seemingly monumental effort to get used to it.
Fortunately, three things where different this time: first, I had developed a renewed curiosity for learning new stuff (my last job all but killed that in me), second Blender 2.5 had just been released and its interface received a complete redesign, third is that I did an impulse buy of CG Cookie’s 2010 Blender Training Videos, which gave me a jumpstart. It turned out that Blender is much more powerful than I ever thought and once you know the basics, the interface is very consistent. Blender 2.5 also features an FBX exporter specifically for XNA.
So here’s a Blender version of my rigging tutorial, using the same turret from 3drt‘s Wargear Turrets pack as I used last time. As before, this is about rigging mechanical things, I may do one about organic models with bone weights later.
Importing the Mesh
Blender cannot open .max files, but my turret came in many different formats, including .3ds, which can be imported into Blender. Unlike 3ds Max, Blender defaults to a one-viewport editor (you can easily toggle to the 4-viewport editor by pressing Ctrl+Alt+Q), but I like Blender’s default just fine.
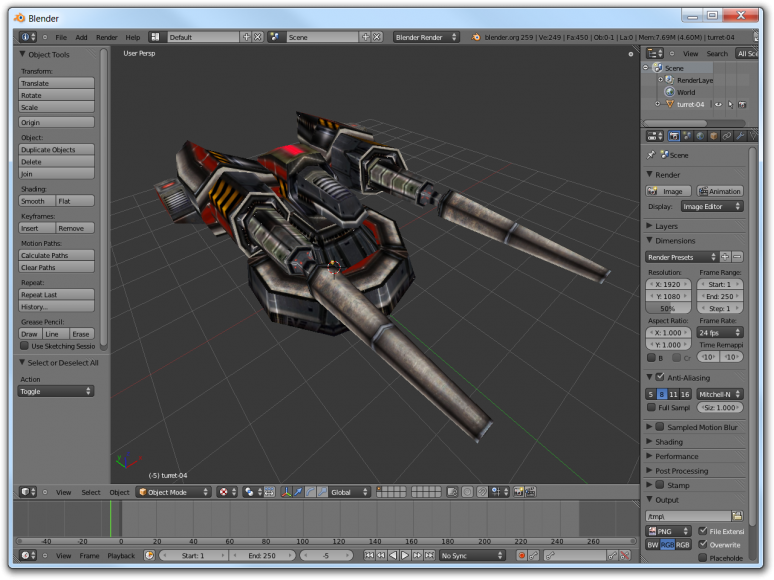
This is my model right after importing it into Blender:
This time, I used the single mesh versions the artist provided. If a model consists of multiple meshes, they can be joined by selecting them all and using Ctrl+J, I believe.
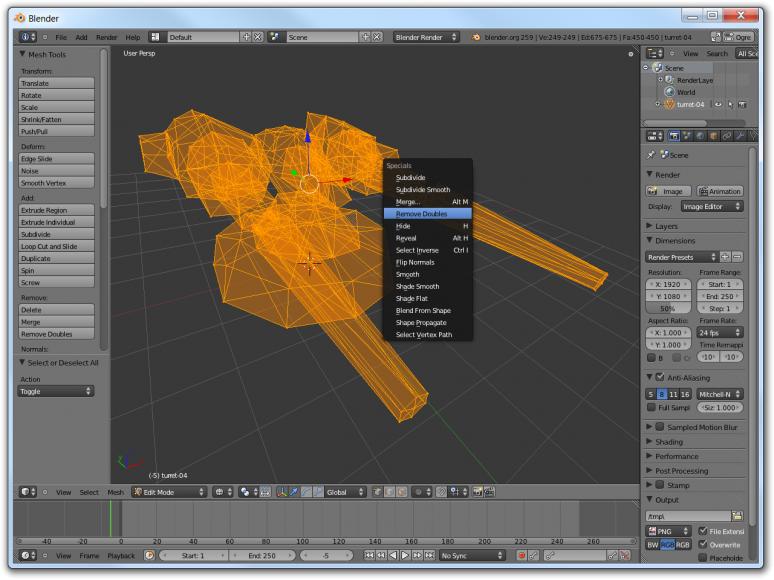
One thing I noticed was that when working with the model, selecting a vertex only highlighted a few of its edges, not all. I’m not sure if this has something to do with the .3ds format, but a lot of vertices in the model had been duplicated. If your model is affected by this, it’s pretty easy to solve: select the model (right click), go into edit mode (Tab), select all vertices (A), bring up the specials menu (W) and pick “Remove Doubles”:
If you wish to adjust the scale, position or orientation of the model, best do it now. I decided that 1 grid unit is 1 meter in my game and that the turret’s base should be about 4 meters wide at the most, so I scale the models up and down as needed and move them so their floor aligns perfectly with the ground.
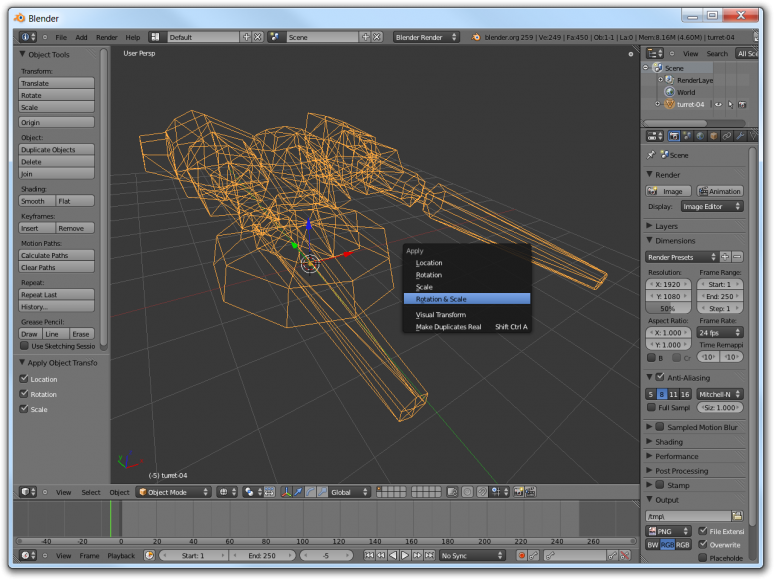
Unless you do this in vertex editor mode, the model’s vertices will not have moved, but its transformation matrix will reflect your adjustments. At this point, I like to "bake" the transforms into the vertices, so the model’s transformation matrix becomes the identity matrix and the vertices, when rendered right with the coordinates the have, will make the model appear exactly as I see it now.
To do so, hit Ctrl+A and pick any of the upper four (there’s no option to bake everything, only location, rotation, scale or rotation & scale). After that, tick all the check boxes in the "Apply Object Transform" panel that appears to bake everything:
Creating Vertex Groups
I have struggled for a long time to understand the relationship between Vertex Groups and Bones in Blender. At least I figured out enough to be able to rig my turret: if you use the same names for Vertex Groups and you use for Bones, upon attaching a skeleton (Armature in Blender) to your mesh, the Vertex Groups for which Bones with matching names exist will be have their weights set to 100% for that bone.
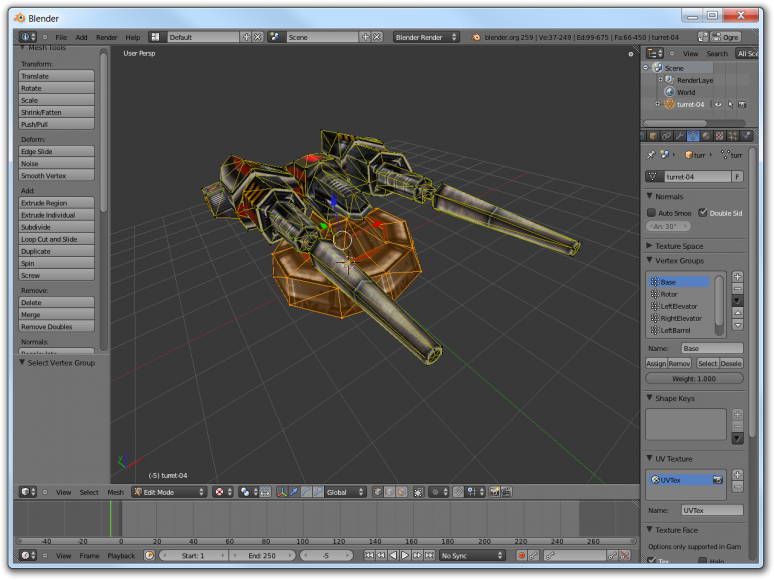
To create Vertex Groups for your model, make sure you are in edit mode (select model via right click, press tab) and then pick the geometry tab, under which you’ll find a panel named &Vertex Groups&. Create one Vertex Group for each movable part of your mesh, then assign the appropriate vertices to each Vertex Group (hint: to select entire elements like in 3ds Max, pick one vertex from each element and press Ctrl+L)
For my model I created the following vertex groups: Base, Rotor, LeftElevator, RightElevator, LeftBarrel and RightBarrel
Creating Bones
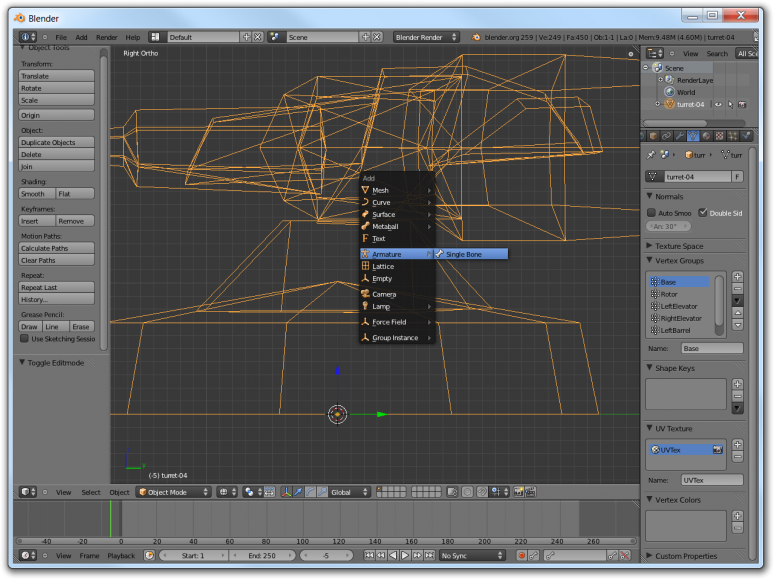
To add bones to a model, go back to object mode (Tab) and open the "Add" menu (Shift+A). Under "Armature", pick "Single Bone" to add a single bone at the current location of the 3D cursor (hint: if you accidentally misplaced the 3D cursor, move the mouse over the 3D view and press N – this will allow you to enter 0,0,0 as the 3D cursor location and it’ll be back in the center)
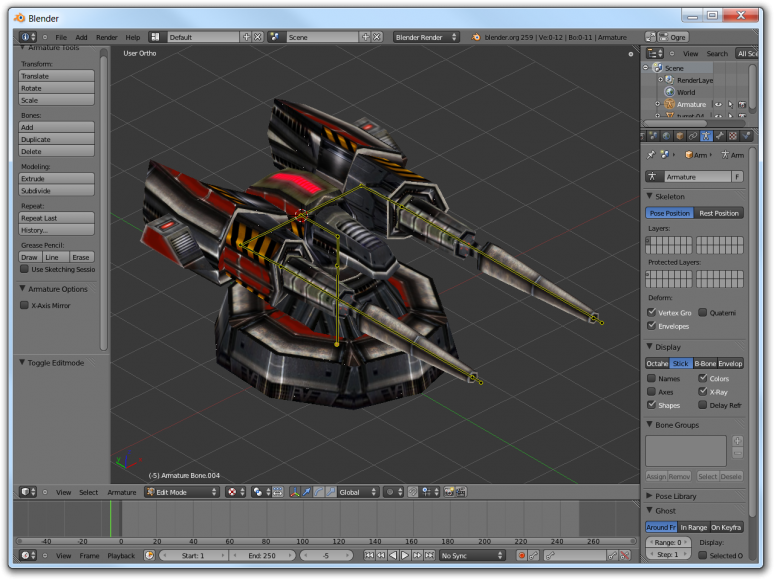
To construct additional bones, select your root bone (right click), enter edit mode (Ctrl+Tab), then pick the end of your bone and press E (for extrude). This creates a new bone parented to the currently selected bone.
As you can see in the screenshot, I decided to create a few bridging bones: the lowest one is the base and controls the overall position and orientation of the entire turret. The shorter one on top of that is the rotor, used to rotate the turret. The next one, leading backwards, and the two extending to the left and right from there, have no purpose other than reaching the location where I wanted to place the next bone.
Once you have reached the location for the next bone (and created the next bone), you can safely delete (press X) these bridging bones and blender will correctly parent any children of the deleted bridging bones to the parent of the bridging bones. There’s probably a better way to do this, maybe by creating detached bones and parenting them (Ctrl+P), but this is how I achieved the result I wanted for now.
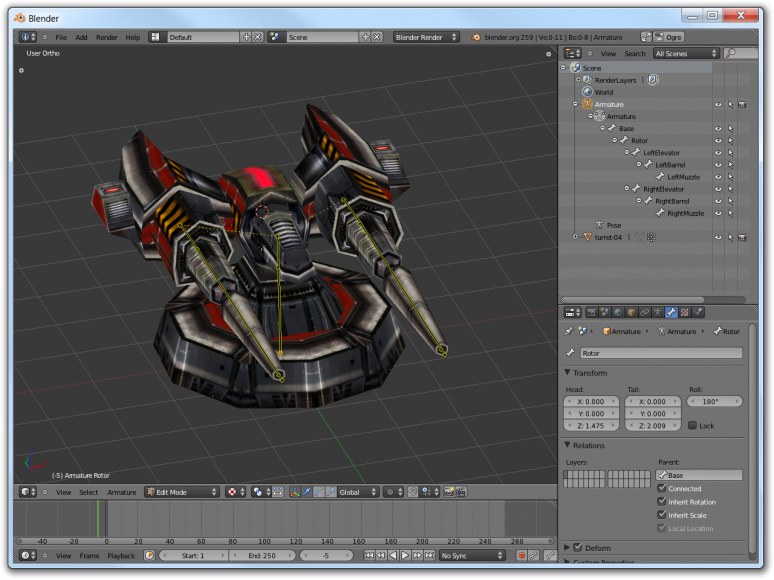
The next step should be naming your bones. Remember to use the same names you used for the Vertex Groups!
Also interesting might be that fact the I created two more bones than I have Vertex Groups: at the end of each barrel, there’s a muzzle bone. This bone isn’t used to deform the mesh, but serves as a tag point to tell my game where to place the muzzle flash when the turret is firing.
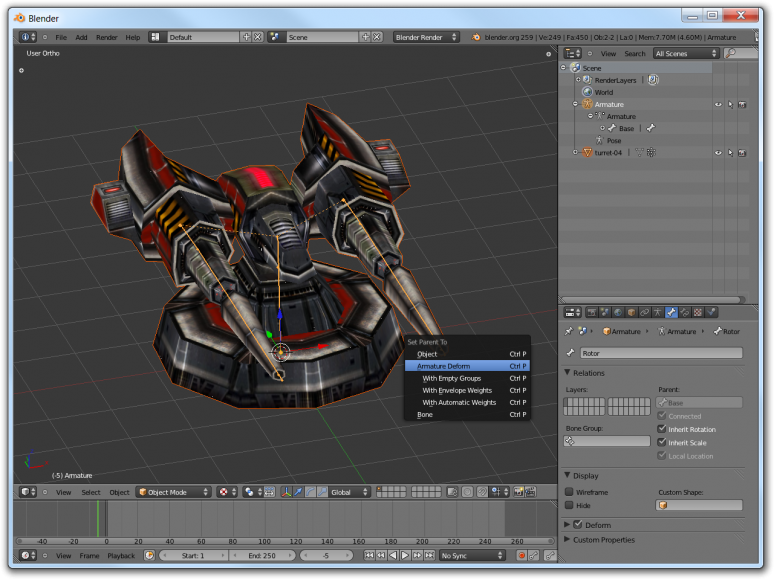
When you’ve made sure your Vertex Groups and bones are correctly set up, go back to object mode (Tab), first pick the model, then (holding Shift) the skeleton/armature. Press Ctrl+P to parent the model to the armature and choose "Armature Deform".
Testing
All that’s left to do is to verify that the bones move the mesh the way to want them to. In object mode, select the skeleton/armature and press Ctrl+Tab to enter pose mode. You can now pick individual bones and rotate them (press R) to see what parts of the mesh will be moved by them.
