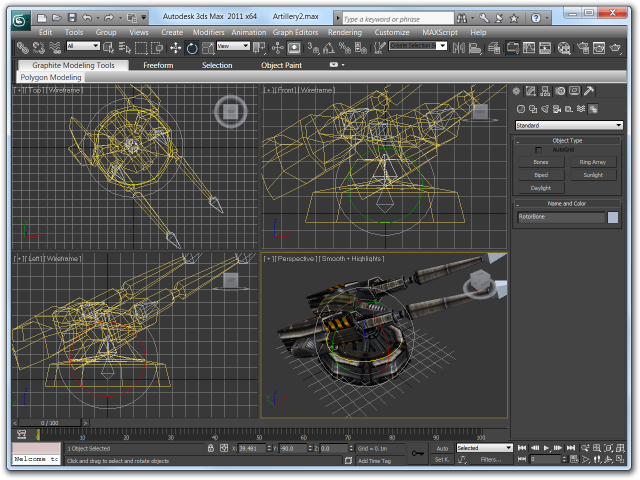
When I started my current game, I didn’t have any idea about model animation. The only thing I knew was the pure concept of bones (which are essentially a matrix stack: when the upper arm bone moves, its children, namely the lower arm bone and hand bone, move with it).
There wasn’t much available in terms of tutorials or guides on the net, so after fighting my way through to a working bone-animated model, I decided to write down the steps I took and illustrate everything as good as I can.
In this article, I will explain how to rig a mesh with bones and skin weights in 3D Studio Max 2011 (there’s a free trial available from Autodesk). I will not explain how to create animations (eg. a walk cycle) and play these in your XNA game because I haven’t spent any time figuring that out yet :P (my current game controls all bones programmatically).
Creating Bones
For modelling, I tried SoftImage XSI (of which XNA premium members get the "Pro" edition for free) but in the end decided to do this with a trial of 3ds Max 2011 because I find it a much more intuitive and sane working environment. I doubt I’ll ever be able to afford it, though…
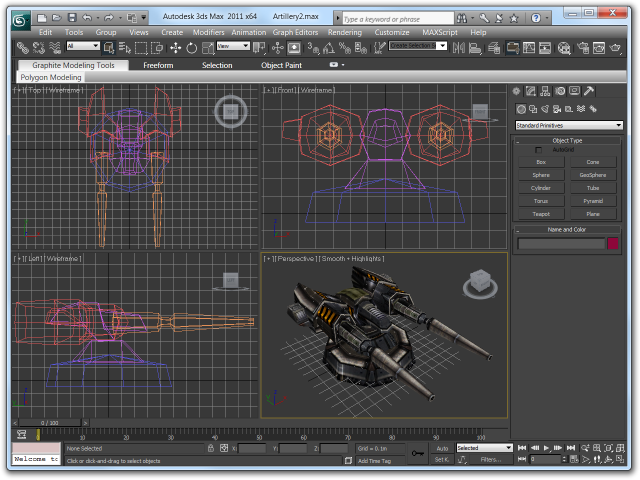
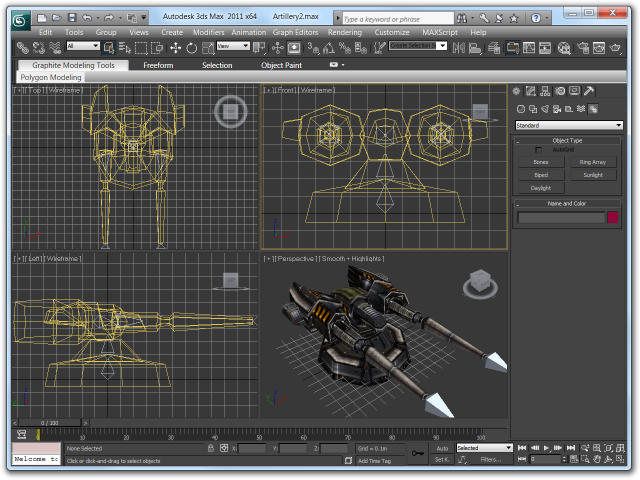
I began with this simple turret model from 3drt.com:
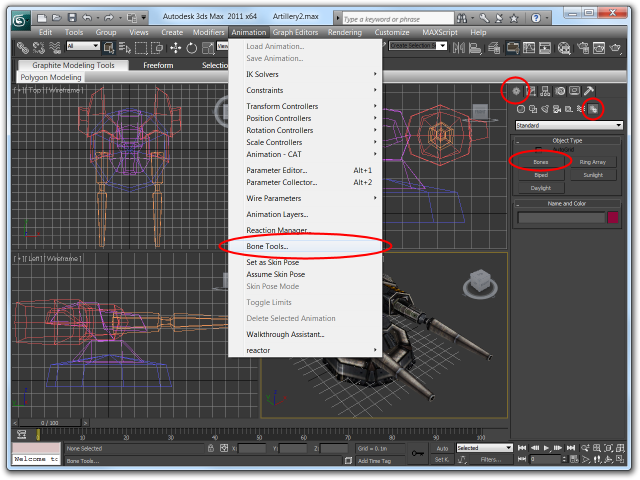
My first step is to add bones to the model. You can do this by selecting the bone primitive from the tools panel on the right or by opening the Bone Tools dialog from the menu which also lets you enter Bone Edit Mode, allowing bones to be moved without their child bones / meshes following.
Bones do not need to touch each other to form a hierarchy: there’s a small chain in the toolbar to the upper left that lets you assign a parent to any mesh or bone by hand. Just select the chain, then drag a line from the object you want to become a child onto its new parent.
It’s generally a good idea to name your bones. For my turret, I created 7 bones:
- BaseBone – This bone is placed at the coordinate system’s center and will later become the reference point for positioning the model.
- RotorBone – A bone that will be rotated on the Y (vertical) axis to turn the turret.
- ElevatorBone – A bone that will be rotated on the X (horizontal) axis relative to the turret’s orientation in order to raise and lower the gun barrels
- LeftBarrelBone and RightBarrelBone – These will allow the barrels to be moved back to simulate kickback when the turret fires.
- LeftMuzzleBone and RightMuzzleBone – Mark the openings of both barrels for the game so it knows where to draw muzzle flashes, smoke, etc.
After all bones were positioned and linked to each other, I ended up with the following hierarchy:
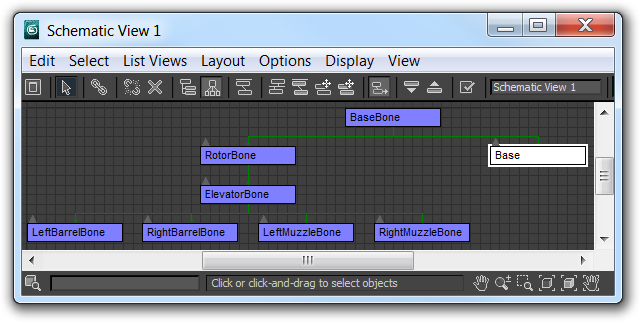
Notice that I linked the base mesh (labaled "Base") to the "BaseBone" – this means that wherever I move the BaseBone, the model will follow. It also seems to be important for the crappy FBX exporter in 3ds Max: if a model contains a mesh that’s not parented to a bone, it will arbitrarily be scaled by a factor of 100 or so. Do not worry about the hierarchy of any other meshes in the model for now as these will go away in the next step.
Merge the Mesh
My second step is to turn the model, still consisting of several independent meshes,
into a single mesh. This will ensure the entire model can be rendered with a
single DrawPrimitive() call in XNA, which is important because those
calls are what defines the performance of an XNA game. If my turret had 6 meshes
like in the above picture, building 25 turrets would already equal 150
DrawPrimitive() calls and begin to bog down an Xbox 360.
Select the mesh that is the base, or root of the model. Most likely, it already has the "Editable Mesh" modifier applied to it. If not, you can safely add it. In the Editable Mesh toolbox, you’ll find a button labeled Attach.
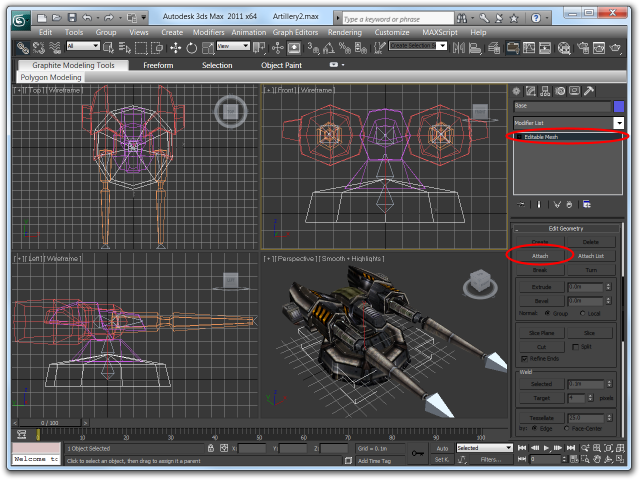
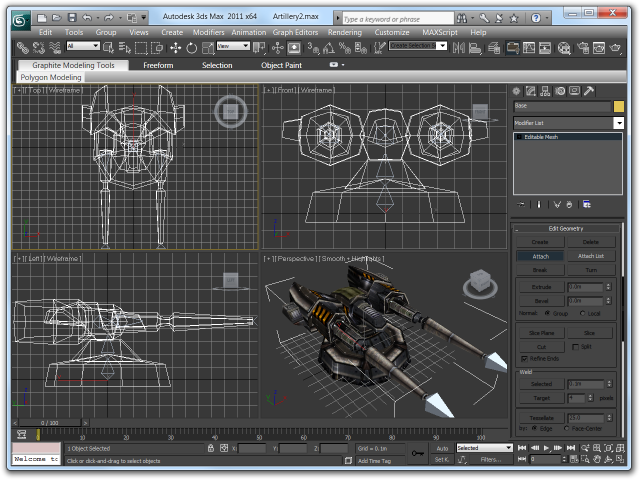
Remember to have the base mesh selected, then click on Attach and pick all of the other meshes in the model one by one. When you’re finished, you’ll have a single mesh like this:
Skinning
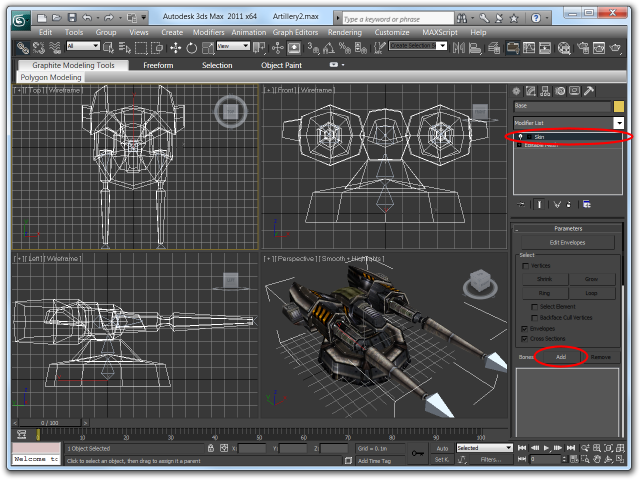
To apply vertex skinning to the model, use the "Skin" modifier:
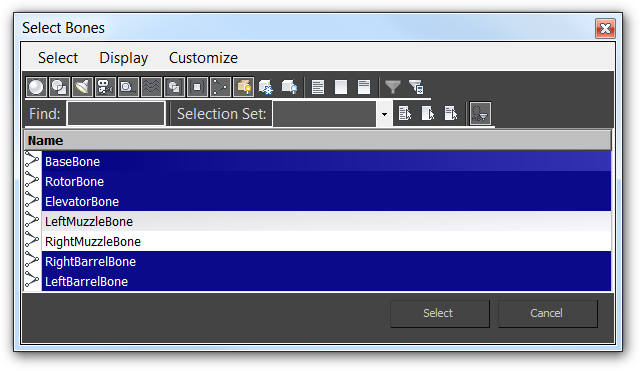
The Skin modifier requires you to select the bones for which weights should be added to the vertices. For my turret, I select all bones except for the muzzle bones (these are only tag points where my game will draw muzzle flashes and such, but none of the model’s geometry will be deformed by these bones).
This also gives you a real reason to name your bones properly ;-)
3ds Max will auto-generate bone weights for the vertices based on their distance to each bone. This would be a good starting point for an organic model, but in my case, the model consists of solid, not bendable metal parts that will all be assigned to one specific bone only (with a weight of 1.0).
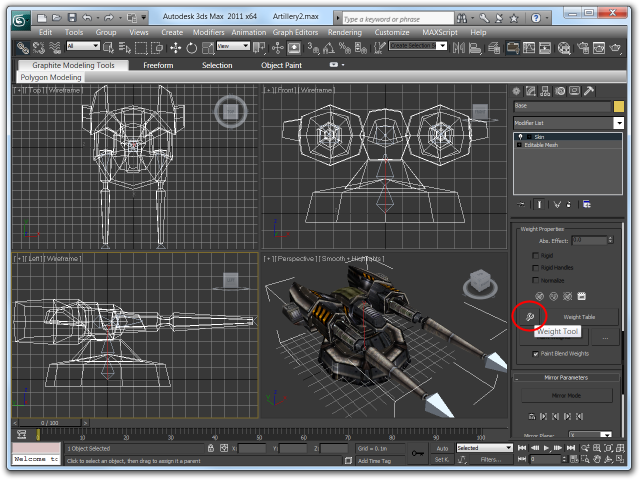
To adjust the bone weights, I use the Weight Tools dialog that can be found in the Skin modifier’s toolbox. Also take note of the Weight Table button immediately to the right of it:
To select vertices, use the Edit Envelope button (which would let you alter the distances by which 3ds Max auto-assigns weights) and check the "Vertices" checkbox below it:
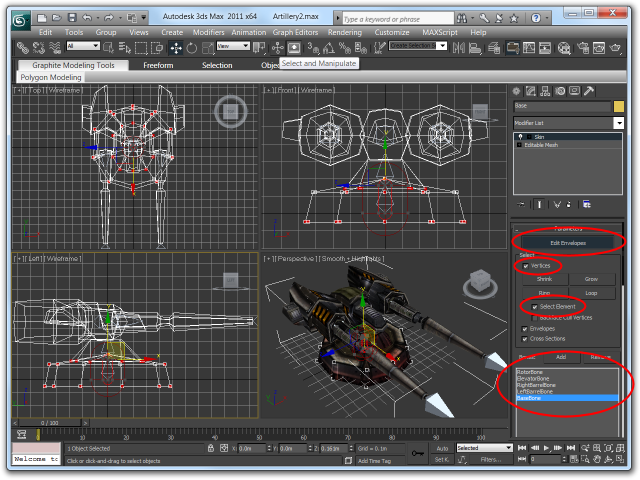
Also useful is the "Element" checkbox which will automatically select all vertices belonging to the same enclosed primitive set (Element) in the model.
As you can see, 3ds Max will highlight the bone weights on the mesh in red. Picking different bones in the Skin modifier’s bone list lets you select which bone’s weights you will alter. In my turret, the auto-assigned weights associate only half of the vertices in its base to the base bone. To change that, I selected all the vertices in the models base (with the help of the "Element" checkbox) and used the Set Weight button with a weight of 1.0 to fully assign the vertices to the base bone:
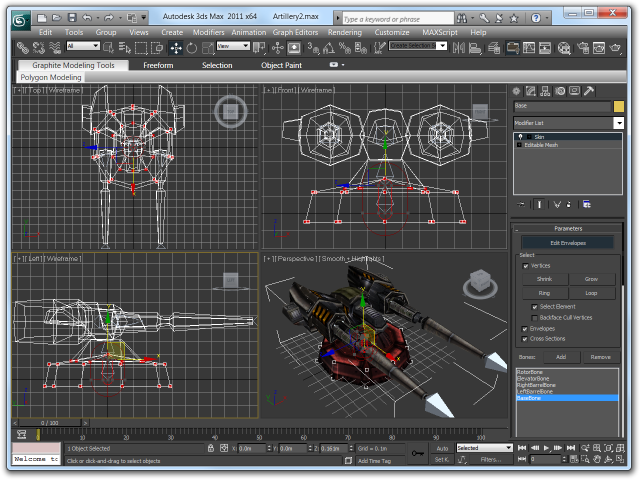
Now the entire base is red, indicating that it belongs to the root bone exlusively. I repeated these steps for the other bones in my model until each bone had the vertices in one part of the model assigned to it.
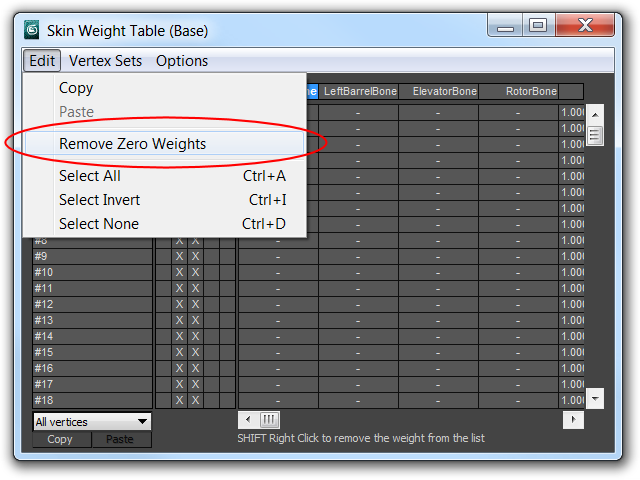
There’s one more step I perform at this point: remove all bone associations with zero weight from the vertices. I don’t know if this actually has any positive effect on rendering performance, but it only requires a few clicks and at least won’t do any harm, so here goes:
Remember the Weight Table button to the right of the Weight Tools button I mentioned before? Press it to open the Weight Table and click on "Remove Zero Weights" in its "Edit" menu:
Testing
Before exporting the model, it’s a good idea to test whether it animates properly. I often find that there are one or two vertices I forgot and it looks just awful if a single vertex in the model’s base distorts everything when the turret rotates, producing weird polygon garbage.
The easiest way to verify your model is to select the bones and use the rotation transform tool to rotate them around. Look closely for any misbehaving vertices!
